มาดูวิธีกันเลยครับ
ในตัวอย่างนี้ผมจะแก้ไอพีพอร์ต eth0 เป็น 192.168.101.80 ส่วน Subnet Mask และ Default Gateway ยังคงเดิม
1. ล๊อกอินเข้า CentOS
ล๊อกอินเป็น root

2. ที่ Prompt รันคำสั่ง setup แล้วกด enter

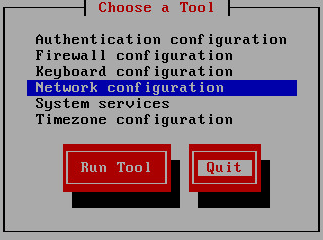
3. จะเห็นหน้าจอแบบในรูป
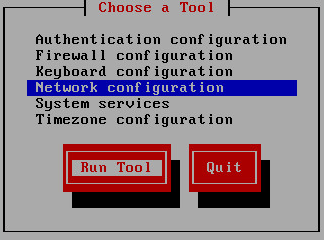
กดปุ่มลูกศรเลื่อนแถบมาที่ "Network Configuration" แล้วกด Enter
4. จะเห็นหน้าจอแบบในรูป
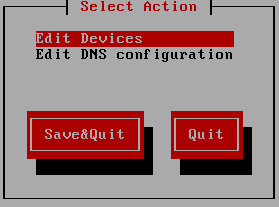
ให้แถบอยู่ที่ "Edit Devices" แล้วกด Enter
5. จะเห็นหน้าจอคล้ายๆแบบในรูป
จะแสดงชื่อพอร์ต lan ที่ CentOS มองเห็น เครื่องของท่านอาจจะแสดงไม่เหมือนเครื่องของผมนะครับ เพราะการ์ดแลนเป็นคนละรุ่น คนละยี่ห้อกัน
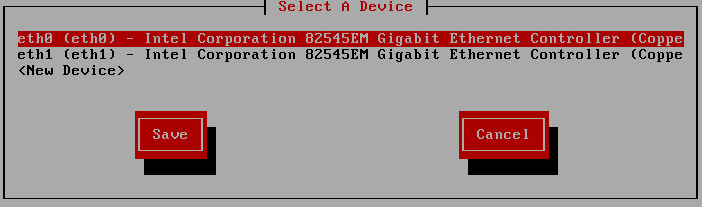
เลื่อนแถบไปอยู่ที่ eth0 ครับ แล้วกด Enter
6. จะเห็นหน้าจอคล้ายในรูป
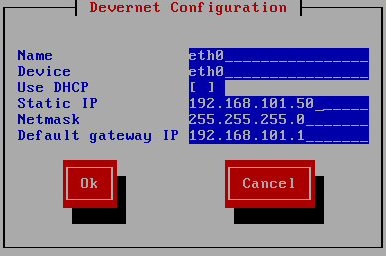
จะเห็น IP Address, Subnet Mask, Default Gateway เปลี่ยนเป็นค่าที่เราต้องการครับ ใช้ปุ่มลูกศรเลื่อนซ้ายขวา ขึ้นลง ใช้ปุ่ม Backspace ลบครับ
จะได้แบบนี้ครับ
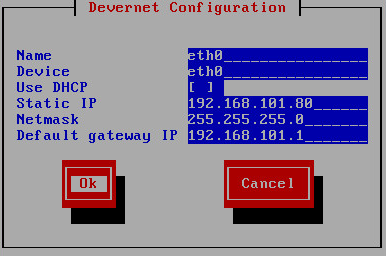
แล้วกดปุ่ม Tab เลื่อนแถบมาที่ Ok แล้วกด Enter
7. จะกลับมาเป็นหน้าจอแบบนี้
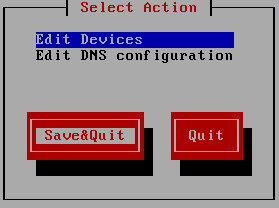
กดปุ่ม Tab เลื่อนแถบมาที่ "Save&Quit" ครับ หรือหากต้องการแก้ไข DNS Server ก็ให้เลื่อนไปที่ "Edit DNS configuration" แทนครับ แล้วกด Enter
8. จะกลับมาหน้าจอเดิมแบบนี้
กด Tab เลื่อนแถบไปที่ "Quit" แล้วกด Enter จะกลับสู่ Command Prompt ครับ
9. รีสตาร์ท Network Configuration เพื่อให้การแปลี่ยนแปลงมีผล
บน Command Prompt รันคำสั่ง service network restart

10. เช็คว่า eth0 เปลี่ยนไอพีหรือยัง เพื่อความชัวร์
บน Command Prompt รันคำสั่ง ifconfig ครับ
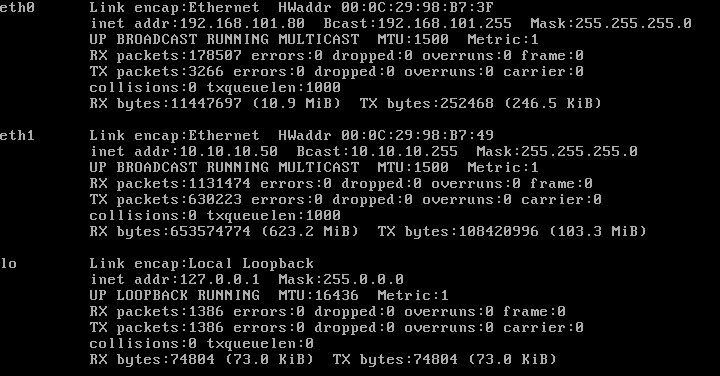
โอเคครับ eth0 มีไอพีเป็น 192.168.101.80 ตามที่เราต้องการแล้ว
ก็เป็นอันว่าขอจบเทคนิคการเปลี่ยน Network Configuration ของ CentOS ไว้เพียงเท่านี้ครับ
บทความที่เกี่ยวข้อง
เทคนิคการติดตั้ง Dual Port Gigabit LAN แบบ PCI Express