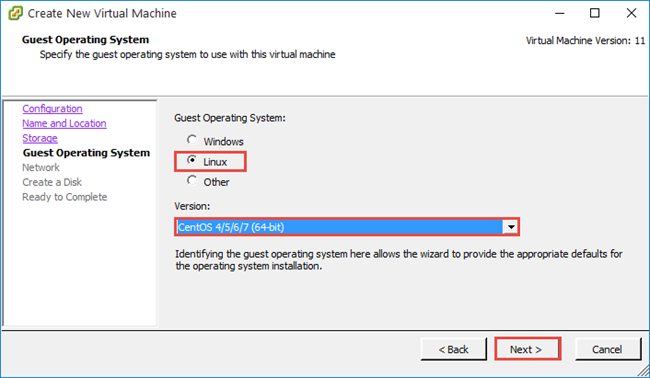
1. ติดตั้ง Elastix บน VMware
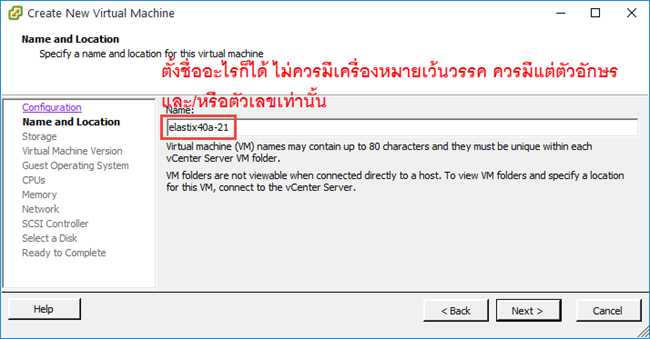
อันนี้จะใช้เป็นต้นแบบครับ ไม่ควรฟิกซ์ไอพีนะครับ ให้เป็น DHCP ไว้นั่นแหล่ะ ตอนเราเอาออกมาใช้งานไอพีจะได้ไม่ชนกันครับ ติดตั้งแล้วก็อัพเดทให้เรียบร้อยเลยนะครับ สมมติว่าผมตั้งชื่อ Virtual machine ว่า "elastix40" นะครับ <--- ตัวต้นแบบนี้ห้ามตั้งชื่อมีเว้นวรรคและห้ามมีอักขระอื่นที่ไม่ใช่ตัวเลขและตัวอักษรนะครับ
ติดตั้ง Elastix บน VMware ESXi
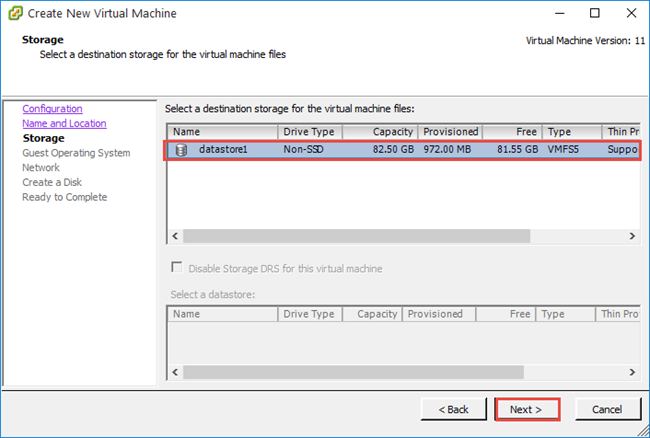
Virtual machine นี้เราจะใช้เป็นต้นแบบครับ เราจะไม่ทำอะไรกับ Elastix เครื่องนี้ หากต้องการใช้งานก็ให้ Copy ไป
2. วิธีการก๊อปปี้ Elastix ต้นแบบไปใช้งาน
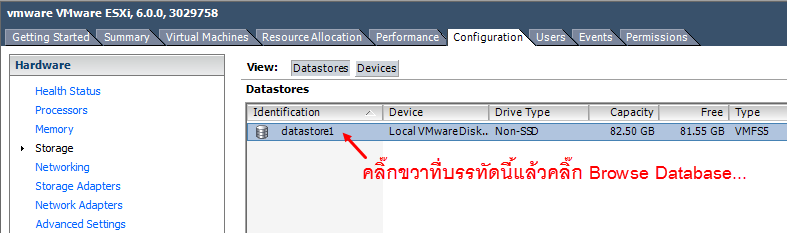
2.1 คลิ๊กแท็ป "Configuration" แล้วคลิ๊ก "Storage" ด้านซ้ายมือ
2.2 คลิ๊กขวาที่ "datastore1" และเลือก "Browse database..."
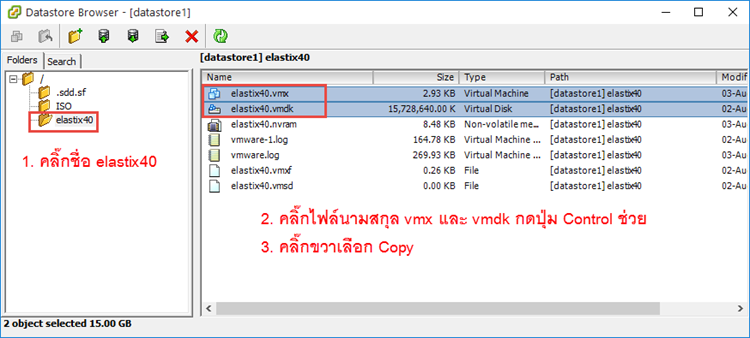
2.3 คลิ๊กที่ชื่อโฟลเดอร์ elastix40 ด้านซ้ายมือ
ด้านขวามือให้คลิ๊กชื่อไฟล์นามสกุล vmx และ vmdk แล้วคลิ๊กขวา เลือก Copy
2.3 คลิ๊กที่เครื่องหมาย / ด้านขวามือคลิ๊กขวาแล้วเลือก New Folder
ตั้งชื่อโฟลเดอร์อะไรก็ได้ ซึ่งในโฟลเดอร์นี้เราจะ Paste สองไฟล์ที่เรา Copy ไว้

2.4 รีเฟรช

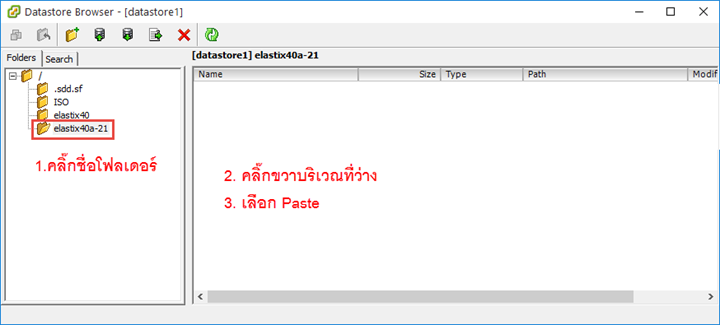
2.5 ด้านซ้ายมือคลิ๊กที่ชื่อโฟลเดอร์ elastix40a [21] ด้านขวามือคลิ๊กขวาบริเวณที่ว่าง เลือก Paste
2.6 รอสักครู่
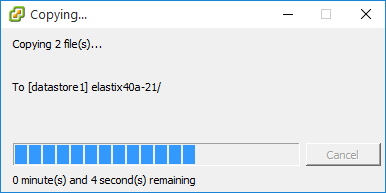
2.7 ผลลัพธ์
2.8 ปิดหน้าต่างนี้หรือสร้างโฟลเดอร์ใหม่แล้ว Paste ใหม่
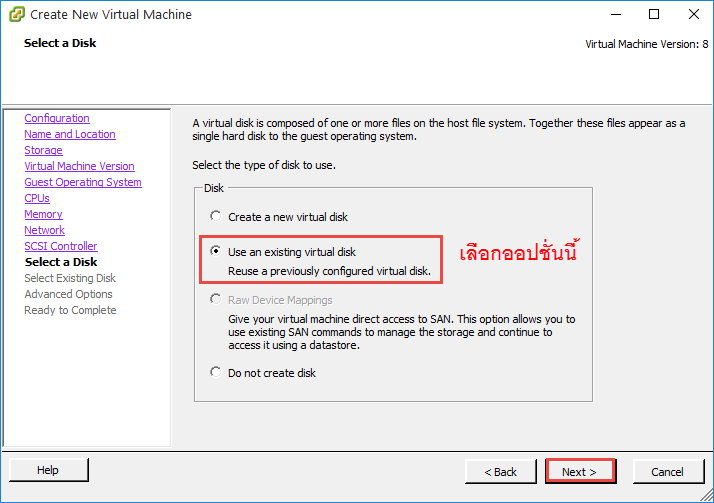
เอาหล่ะครับ เราก็ได้สร้าง Elastix เพิ่มขึ้นมาอีก 1 เครื่องแล้ว แต่เรายังเอาไปใช้งานไม่ได้นะครับ เพราะเราทำของเราเอง ซึ่ง ESXi ไม่ได้รับรู้เรื่องอะไรด้วย ต่อไปนี้ผมจะแนะนำวิธีการ Activate Elastix ที่เพิ่งก๊อปมานี้ครับ
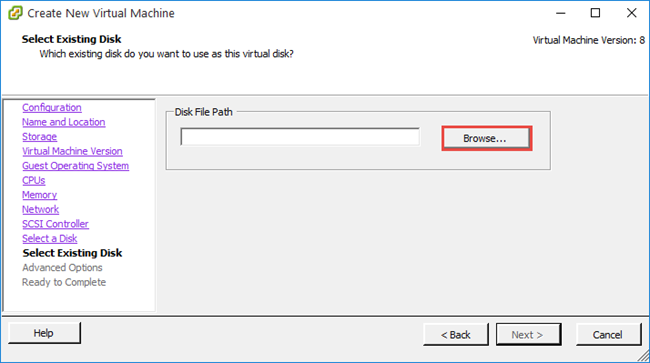
3. วิธีการ Activate
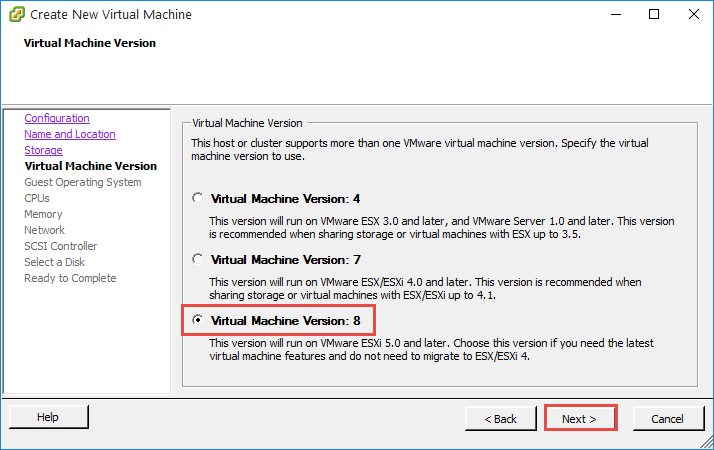
3.1 สร้าง Virtual


เปิดบริการ อบรม Elastix ด้วยคอร์สพิเศษ ให้ติดตั้ง คอนฟิกคล่อง ใช้งานคล่อง ได้ใน 3 วัน